")
")
• Πριν ξεκινήσετε την κατασκευή διαβάστε όλες τις οδηγίες για να κατανοήσετε πως θα προχωρήσετε.
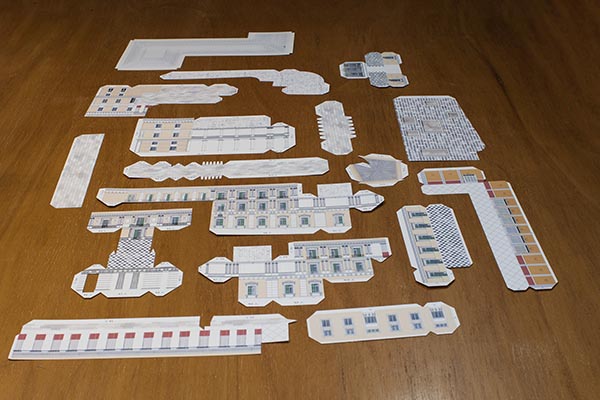
• Παρατηρήστε τα κομμάτια, εντοπίστε τα γράμματα και βεβαιωθείτε πως έχετε καταλάβει τα σύμβολα που χρησιμοποιούνται:
_Λ_ : κρατήστε το κομμάτι με την τυπωμένη πλευρά προς τα πάνω και διπλώστε προς τα κάτω
_V_: κρατήστε το κομμάτι με την τυπωμένη πλευρά προς τα πάνω και διπλώστε προς τα πάνω
• Before you start read the instructions carefully.
• Observe the pieces and make sure you understand the symbols used:
_Λ_ : Hold the piece with the printed side facing up and fold the paper downwards.
_V_: Hold the piece with the printed side up and fold it paper upwards.

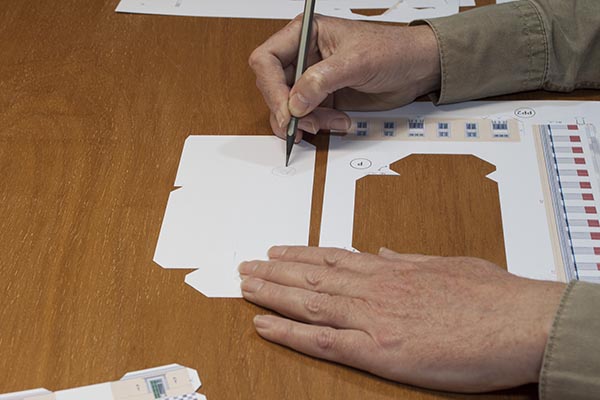
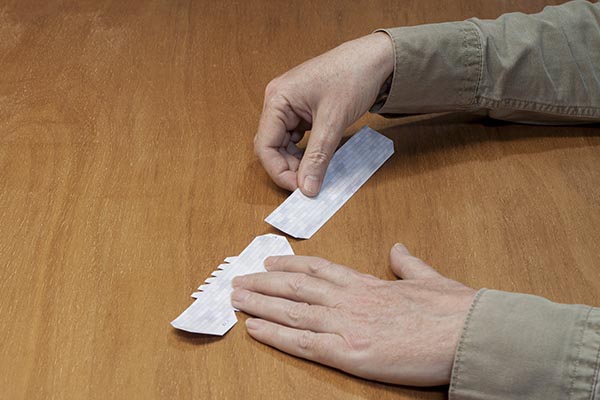
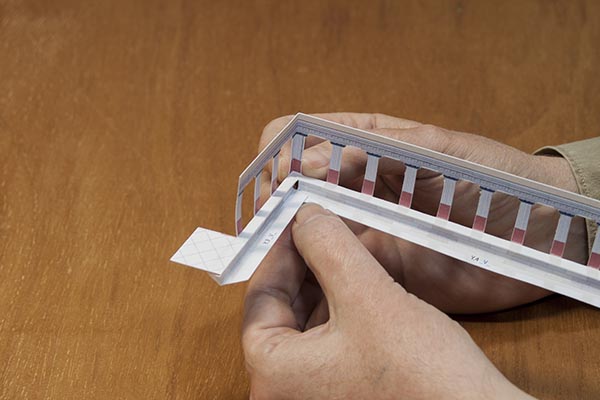
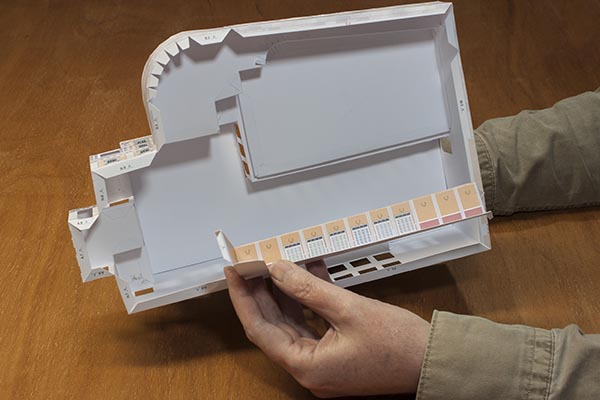
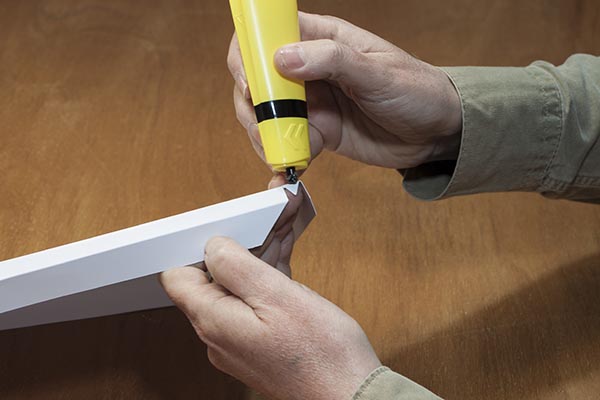
• Αφαιρέστε προσεκτικά τα κομμάτια από τις καρτέλες και διπλώστε τα όπου χρειάζεται.
ΠΡΟΣΟΧΗ! Κρατήστε τις κενές καρτέλες γιατί ορισμένες από τις σημάνσεις βρίσκονται σε αυτές. Είναι χρήσιμο να σημειώσετε με μολύβι στην πίσω πλευρά των κοματιών τυχόν αριθμούς και γράμματα που βρίσκονται σημειωμένα στις καρτέλες για να τα βρίσκετε ευκολότερα.
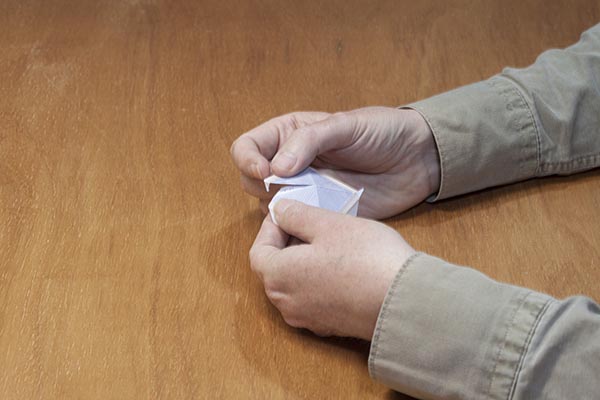
Όλα τα σημεία που πρέπει να κολληθούν έχουν σήμανση με ένα γράμμα κι έναν αριθμό (π.χ. Α.1).
Κάθε γράμμα αντιστοιχεί σε συγκεκριμένο κομμάτι, ενώ κάθε αριθμός σε κόλληση. Κολλήστε μεταξύ τους τα σημεία με την ίδια σήμανση ως εξής: Απλώστε ένα όσο το δυνατόν λεπτό και λείο στρώμα κόλλας στο σημείο με τα μαύρα γράμματα και αφού περιμένετε λίγο ώστε να στεγνώσει η κόλλα, κολλήστε το στην πίσω πλευρά (ατύπωτη) στο σημείο με τα κόκκινα γράμματα.
• Carefully remove the pieces from the sheets and fold them where necessary.
IMPORTANT! Do not discard the used sheets, as they bear useful markings.
All points where adhesive is to be applied, are marked with a letter and a number (e.g. A.1).
It is recommended to copy the markings (letters and numbers) appearing on the sheets
at the back side of the pieces to locate them easily.
Each letter corresponds to a specific piece, while each number shows where to glue. Stick together the points with the same markings as follows: Apply a thin and smooth layer of adhesive to the side with the black letters and wait for a while until the adhesive dries; then place it on the back (not printed) side of the piece with corresponding red letters.


• Ξεκινήστε με τα κομμάτια Α, Η, Ι, Ν, Ρ, Β1-Β2, ΡΡ1, ΥΥ κολλώντας όπου χρειάζεται για να σχηματιστεί το κάθε κομμάτι (Α.1-Α.1, Α.2-Α.2, Β.1-Β.1, Η.3-Η.3, Η.4-Η.4, Ι.7-Ι.7, Ν.5-Ν.5 κλπ).
• Start with pieces A, H, I, N, P, B1-B2, PP1, YY by gluing where necessary to form each piece (A.1-A.1, A.2-A.2, B.1-B.1, H.3-H.3, H4-H4, I.7-I.7, N5-N5 etc).


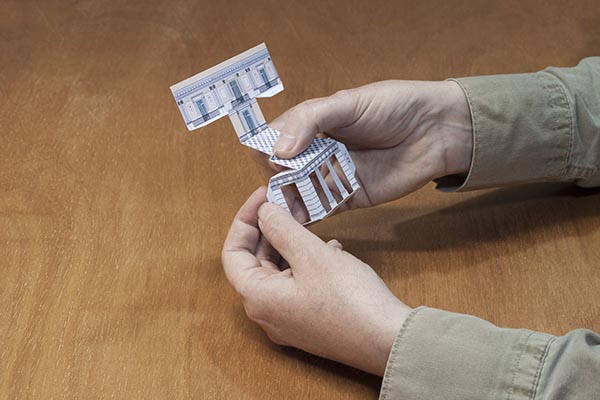
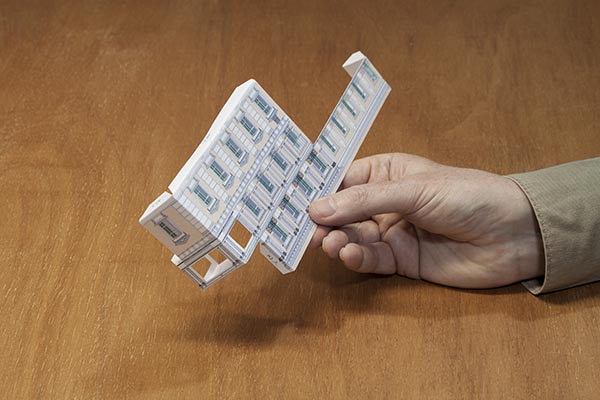

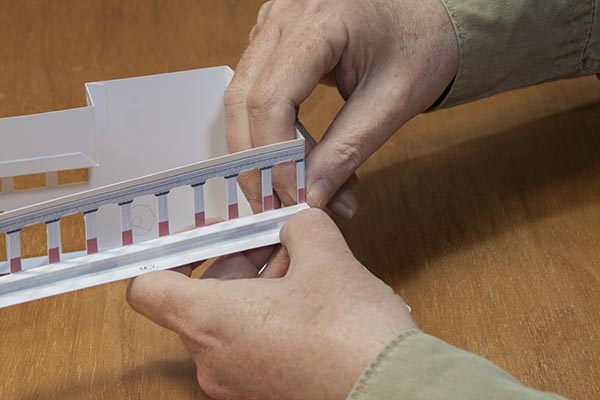
• Στη συνέχεια κολλήστε μεταξύ τους τα κομμάτια Α, Η & Ν (Ν.3-Ν.3, Α.4-Α.4, Ν.7-Ν.7, Α.9-Α.9 & Η.2-Η.2, Α.3-Α.3, Η.5-Η.5, Η.6-Η.6, κλπ).
• Couple pieces A, H & N (N.3-N.3, A.4-A.4, N.7-N.7, A.9-A.9 & H.2- H.2, A.3-A.3, H.5-H.5, H6-H6, etc.)


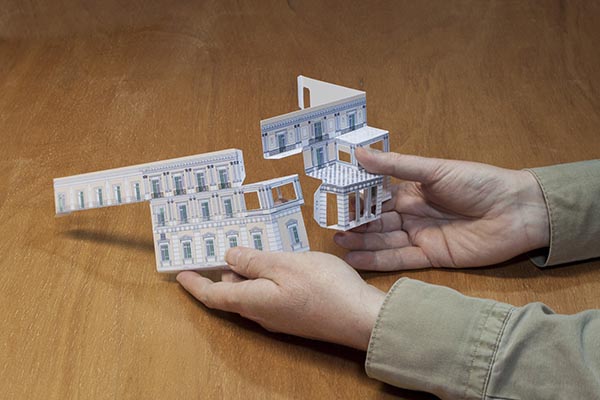

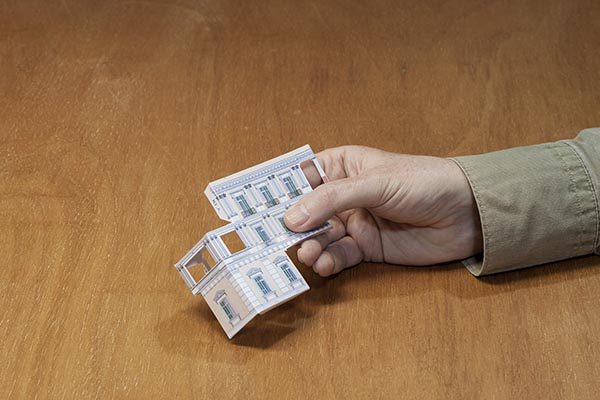
• Κολλήστε το κομμάτι Ρ στο κομμάτι Η, το κομμάτι Μ στο κομμάτι Ρ.
• Glue piece P on piece H, piece M on piece P.
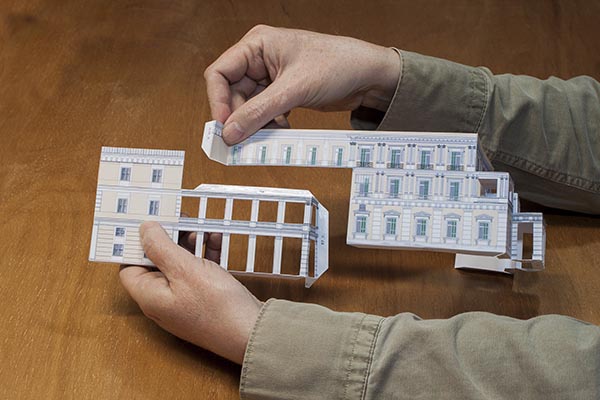


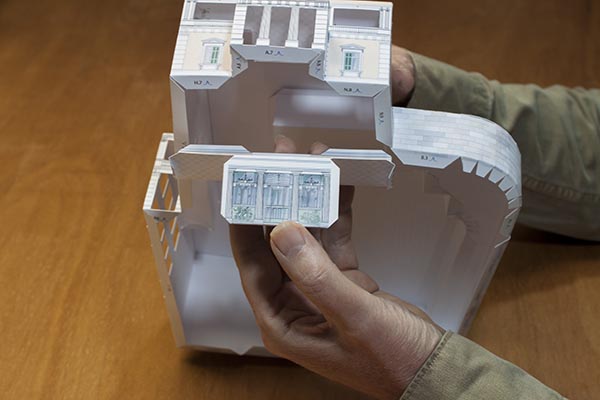
• Κολλήστε προσεκτικά στη θέση του το κομμάτι Υ
• Carefully stick Y piece in place.

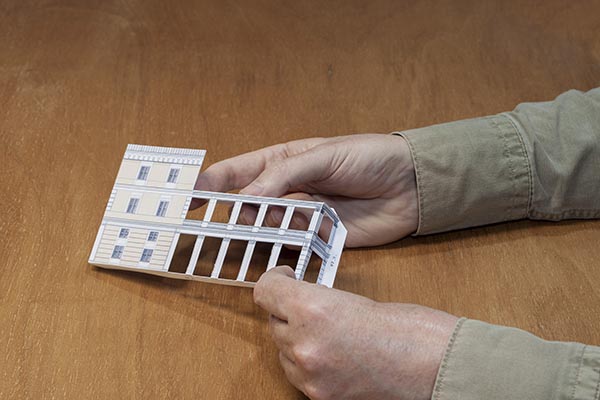
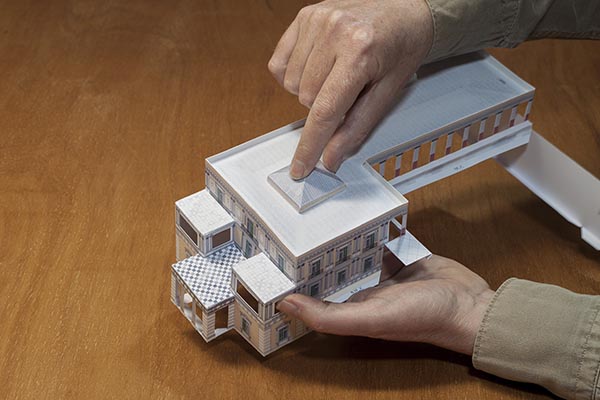
• Κολλήστε τη στέγη Ζ στη θέση της.
• Glue the roof Z in place.


• Κολλήστε στη στέγη το κομμάτι Ι στη θέση του.
• Glue piece I in place.
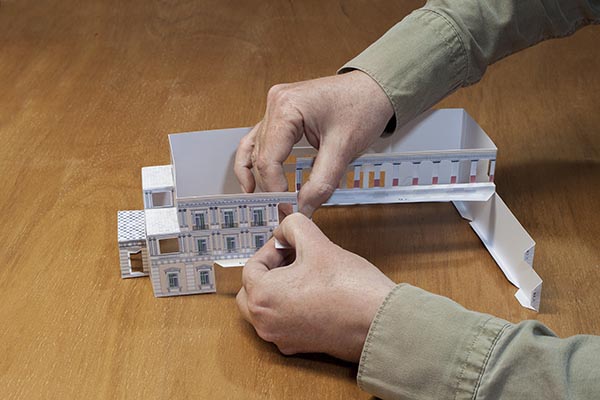
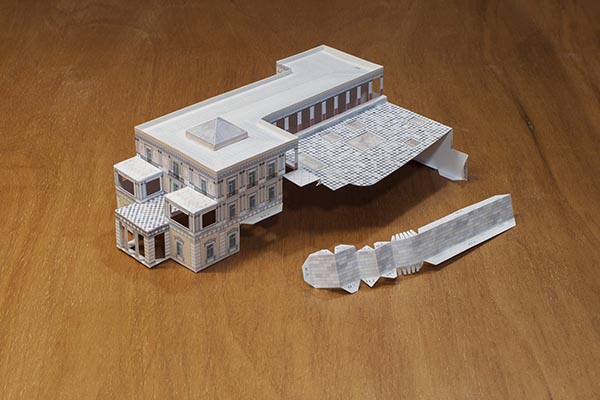
• Προσθέστε το κομμάτι Ο, το κομμάτι Κ και στη συνέχεια τα κομμάτια Ε και B (Β1+Β2).
• Add piece O, piece K and then pieces E and B (Β1+Β2).


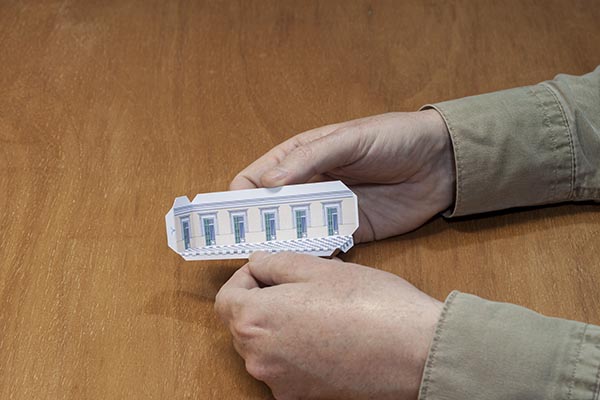
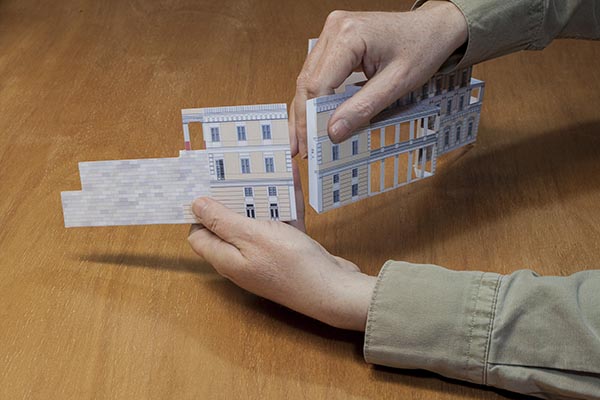
• Γυρίστε το μοντέλο ανάποδα και κολλήστε το κομμάτι ΥΥ στην εσωτερική πλευρά του Υ.
• Turn the model upside down and attach the YY piece to the inside of Y.

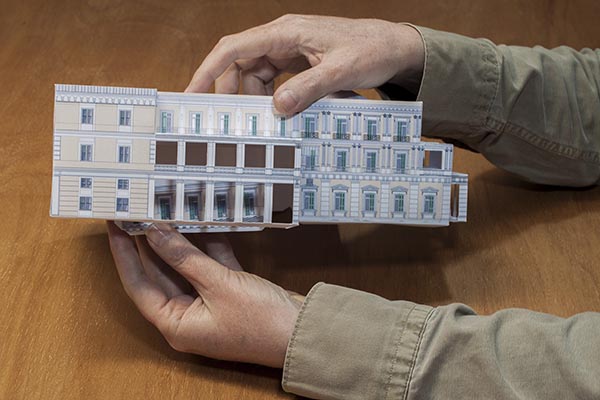
• Διπλώστε και κολλήστε το ΑΑ στην εσωτερική πλευρά του Α ώστε να συμπληρωθεί η πρόσοψη.
• Fold and glue the AA on the inside of A to assemble the facade.
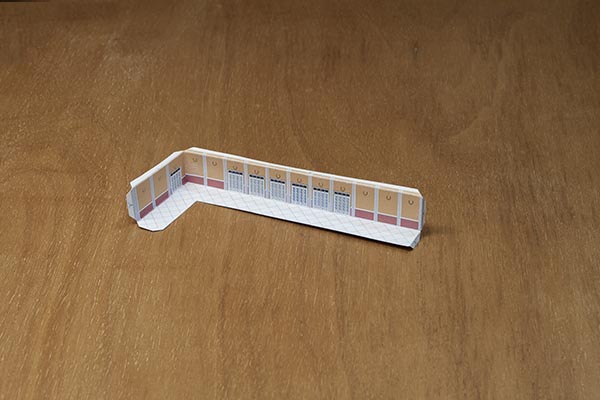
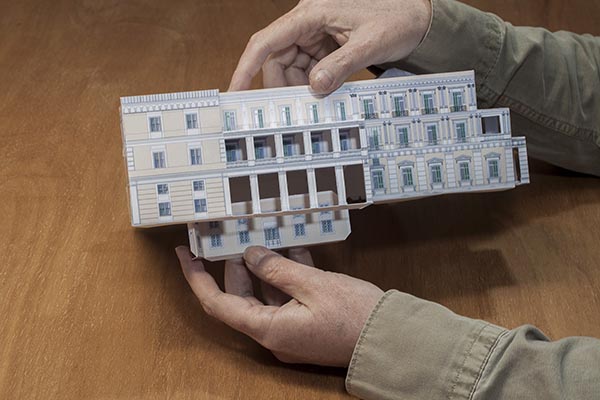
• Κολλήστε το ΡΡ1 στον 1ο όροφο, στην εσωτερική πλευρά του Ρ και στη συνέχεια το ΡΡ2 στο ισόγειο κάτω από το ΡΡ1.
• Glue PP1 to the 1st floor inside of P and then PP2 on the ground floor below PP1.
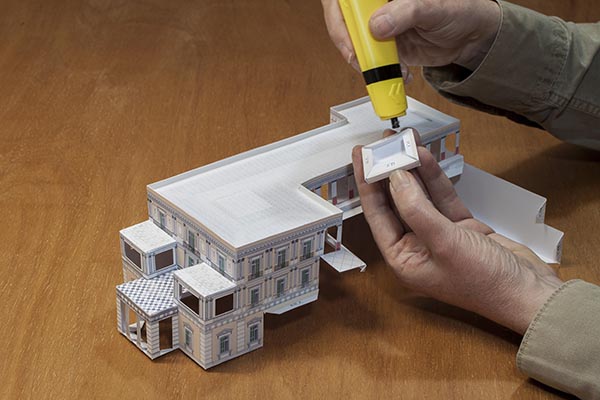
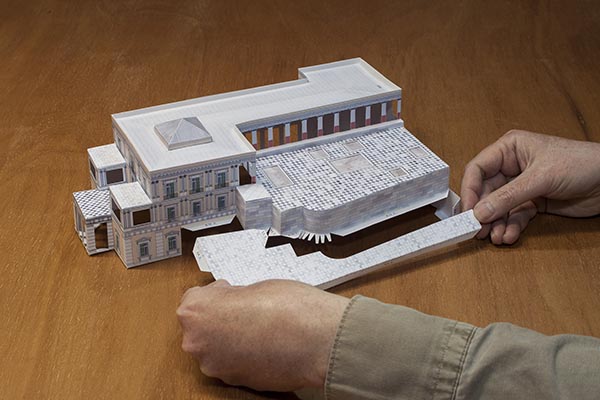
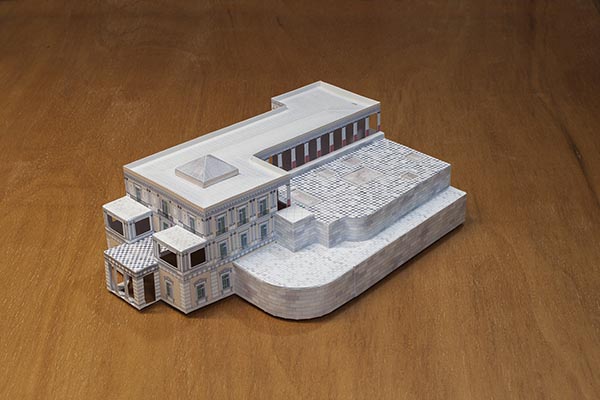
• Συναρμολογήστε τη βάση φροντίζοντας οι οδηγίες να βρίσκονται από την κάτω πλευρά και κολλήστε πάνω της το έτοιμο μοντέλο.
• Assemble the base and attach the finished model to it. The side with the printed instructions should face downwards.

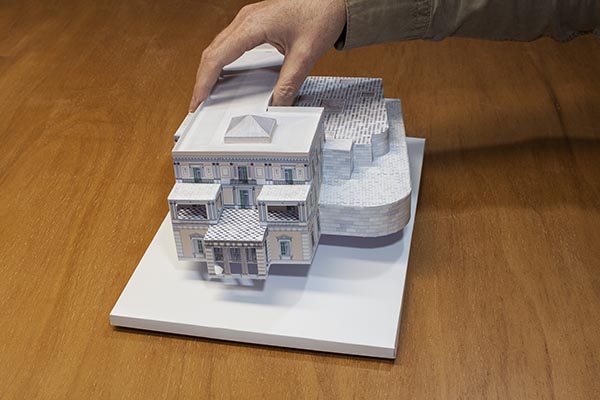
Αυτό ήταν!
That’s it!